Using Azure Pipelines to Publish your GitHub project to NuGet
Posted: December 11, 2018 Filed under: Azure, DevOps | Tags: Azure, Azure Pipelines, Continuous Deployment (CD), Continuous Integration (CI), DevOps, YAML Leave a commentAzure Pipelines is Microsoft’s new cloud-based continuous integration (CI) and continuous deployment (CD) service that lets you build and test software written in any language and deploy it to any platform. And one of the best things is that it’s completely free to use for open source projects. In this post you will learn how easy it is to set up it up to build, test and package a .NET standard project that is hosted on GitHub before deploying it to NuGet.
Azure Pipelines
Azure Pipelines is part of Azure DevOps, which is the successor to Microsoft’s collaboration platform Visual Studio Team Services (VSTS). It’s a collection of open and extensible services that are built into Azure and give you access to a bunch of things you need to be able to manage your teams and code. Just like with VSTS this includes for example boards for flexible planning and tracking of work across teams, a version control system that supports both Git and TFVC and gives you an unlimited number of private Git repositories, test management tools and some extensive CI/CD functionality.
Besides the new branding – apparently one of the issues with the previous naming was that people tend to associate the name of Visual Studio with .NET development only – Microsoft have done a lot of work trying to simplify the web-based user interface and make it easier to use for both developers and business users. Also, the services that make up the Azure DevOps suite have been separated out in order for them to be easier to understand and use on a per-need basis. You can now enable and disable individual services in your projects.
If you are using VSTS today, you can still continue to do so. The new interface is the default for any new projects and can be enabled under Settings->Preview Features in the portal for existing VSTS projects. Note that the project URLs will change from organization.visualstudio.com to dev.azure.com/organization but redirecting is supported.
GitHub
Azure Pipelines is also tightly integrated with GitHub and, as mentioned before, the focus of this post is to provide an example of this. All you need to follow along is a GitHub repository with some code in it and a free Azure DevOps account. The latter gives you an unlimited number of free build minutes for public projects, and you may run up to 10 parallel jobs across cloud hosted Linux, macOS and Windows build agents using the very same infrastructure that paying customers use – without any performance constraints.
In my very simplistic sample repository, I have the following class:
public class Calculator
{
    public int Add(int a, int b) => a + b;
    public int Subtract(int a, int b) => a - b;
}
And the following unit tests to test its functionality:
[TestClass]
public class CalculatorTests
{
    [TestMethod]
    public void AddTest()
    {
        Calculator calculator = new Calculator();
        Assert.AreEqual(2, calculator.Add(1, 1));
        Assert.AreEqual(10, calculator.Add(5, 5));
        Assert.AreEqual(0, calculator.Add(1, -1));
    }

    [TestMethod]
    public void SubtractTest()
    {
        Calculator calculator = new Calculator();
        Assert.AreEqual(0, calculator.Subtract(1, 1));
        Assert.AreEqual(-4, calculator.Subtract(3, 7));
        Assert.AreEqual(15, calculator.Subtract(10, -5));
    }
}
The solution in Visual Studio looks like below. DemoLibrary is a .NET Standard project and DemoLibrary.UnitTests is a .NET Core MSTest test project.

I should point out that I could have used any programming language here. C# and .NET just happen to be my personal favorite language and platform, but Azure Pipelines has full support for other languages and platforms as well. This includes for example Node.js, Python, Java, PHP, Ruby, C/C++, Android and iOS. It’s built for any language, any platform and even any cloud – not just Azure.
I specify the unique id of the NuGet package to be created by the build by editing the .NET Standard project file. Visual Studio lets you do this by either using the “Edit *.csproj“ option on the Project menu and adding a element explicitly yourself, or by using the designer under Project->Properties->Package. Besides the package id, you may also specify a bunch of other properties of your package such as for example a description about it, the name of the author and some copyright and licensing information. All this information will be added to the .csproj file:
<Project Sdk="Microsoft.NET.Sdk">
  <PropertyGroup>
    <TargetFramework>netstandard2.0</TargetFramework>
    <PackageId>MyPackage</PackageId>
    <Authors>Magnus</Authors>
    <Product>Calculator</Product>
    <Description>A demo calculator.</Description>
  </PropertyGroup>
</Project>
Once you have pushed your code to GitHub – the easiest way to do this if you are using Visual Studio would be to download and install the GitHub for Visual Studio Extension, click on the ”Add to Source Control” button in the bottom-right corner or from the File menu, switch to the Team Explorer window, click on the Sync tab and use the Publish to GitHub dialog – you can set up Azure Pipelines to build your code – either from the Azure portal or from the GitHub marketplace.
Choosing the latter option, you browse to github.com/marketplace and search for the “Azure Pipelines” marketplace. Select it and click on the “Set up a plan” button before you select the free plan and install it by clicking on the green install button. You will note here that Azure Pipelines is also free for private projects, up to 1,800 build minutes per month.

On the next two screens you get to select the GitHub account (in case you have several) to which you want to install Azure Pipelines, complete the “order” and begin installation of the service. What happens when you click on the “Install” button and authenticate against Azure with your Microsoft account is that you give Azure Pipelines the permission to access your GitHub repository and setup your project in the cloud. Once this process has been completed you are redirected to the new pipeline designer in the portal. If you don’t go through the GitHub marketplace, you will land on the same page by selecting the “New build pipeline” option under the build tab in the Azure DevOps portal, and select GitHub as the location of your source. This will require you to grant Azure Pipelines permission to access your GitHub repository using your personal GitHub identity.

When you have selected the repository that you want to build by clicking on it, the Azure Pipelines service will attempt to suggest a compatible pipeline template for building your project based on some analysis of the code in this repository. You can either choose to use any of the suggested templates – there are built-in templates for building everything from .NET desktop to PHP and Go applications – or you could start from scratch by selecting the “Starter pipeline” template.
YAML
A template is represented by a YAML file in Azure Pipelines. A YAML file is a configuration file that describes the build pipeline and will be checked in right next to the source code in your GitHub repository when you finally click on the “Save and Run” button. This is a DevOps best practice known as Configuration as Code (CAC). It enables you to version the build description along with the code that is being built so that whenever your code is modified, and the build must be changed in order to support these changes, the changes to the configuration that sets up and defines the build is being checked in and version controlled as well.
The build pipeline in a YAML file consists of one or more jobs. A job is a series of tasks or steps that will run sequentially on the same host machine where the built agent is installed by default. You can specify a bunch of properties for a job, like for example the operating system, tools, and dependencies that your build requires – or you can skip the job syntax completely if you need only a single job with the standard options. A detailed reference, including a catalog of all supported YAML capabilities, and the available options is available in the docs.
In this example I want to build the entire solution, run the unit tests and finally package the .NET Standard as a NuGet package. Below is an example of a complete YAML file that will tell Azure Pipelines to do this in a single job.
pool:
  vmImage: 'ubuntu-16.04'

variables:
  buildConfiguration: 'release'
  major: 1
  minor: 0
  patch: $[counter('myversioncounter', 0)]

steps:
- script: |
    dotnet build -c $(buildConfiguration)
    dotnet test DemoLibrary.UnitTests -c $(buildConfiguration)
    dotnet pack DemoLibrary/DemoLibrary.csproj -c $(buildConfiguration) /p:PackageVersion=$(major).$(minor).$(patch) --output $(Build.ArtifactStagingDirectory) --no-build --no-restore

- task: PublishBuildArtifacts@1
The vmImage option specifies which virtual machine image to use when building. The default Microsoft-hosted agent pool provides five images with the Ubuntu 16.04 (ubuntu-16.04) and Visual Studio 2017 on Windows Server 2016 (vs2017-win2016) being the recommended ones to use for .NET Core teams.
There is also a catalog of built-in tasks available. script is a shortcut for a command line task, i.e. it will run a script using the cmd.exe tool on Windows and using Bash on other platforms. Here I use the .NET Core Command-Line Interface (CLI) to build, test and package the code. The second task then use another built-in task to publish the build artifacts – the output of the build – to a file share in the cloud.
You can reference both system-defined variables and your own custom user-defined variables in the tasks. $(Build.ArtifactStagingDirectory) is a predefined variable that is set by system. It gives you the local path on the agent where any artifacts are copied to before being pushed to their destination. In the above sample file, I have also defined four custom variables that I reference in the script task using the macro syntax $(variableName). The patch variable uses a counter that is automatically incremented by one in each time the pipeline is executed. This means that the NuGet package will get a new patch number for each build. The optional argument (0 above) specifies the initial value.
If you have an existing build pipeline set up in VSTS, you can export it as YAML by clicking on the “View YAML” link in the edit build view:

Saving the pipeline by clicking on the “Save and Run” button will commit an ./azure-pipelines.yml file to the Git repository. You have the option to commit and push it directly to the master branch or create a new branch and start a pull request. When committed a new build will be queued immediately and if all goes well, you should eventually see the build succeed.

If you already have an existing YAML file in your project when you set up the build pipeline, it will be automatically detected by the service provided that it’s named azure-pipelines.yml and is located in the root of your repository. If it’s located in some other path, you will have to switch over to the old user interface in the portal to be able to select and use it. You do this by switching off the “New YAML pipeline creation experience” option on your profile or organization by selecting the “Preview features” option on the profile menu in the top-right corner in the portal. You will then be able to create a new pipeline using the old experience by first selecting your source repository and the default branch. When you get to select a template, you can then enable CAC by clicking on the “Apply” button for the YAML template. This will let you select a custom YAML path:

Continuous Integration (CI)
Azure Pipelines enables continuous integration by default. This means that a new build will be triggered whenever something is committed to the repository. If you don’t want this, you can disable it by clicking on the “Edit” button in the portal, select the “Triggers” view and then select the “Disable continuous integration” option:

You also get pull request validation set up by default. This means that whenever someone in your team checks in a code change by following best practices and create a new feature branch, Azure Pipelines will queue a new build against the pull request branch. If the build succeeds and the tests pass, you will – assuming your test coverage is good enough – then be able to safely merge the changes into your master branch without having to worry about the quality of your code. Azure Pipelines sends status updates back to the pull request page on GitHub, so you can easily see whether all checks have passed from there. From GitHub you can also easily click through to the portal to view detailed logs of the build steps and merge the changes once the pull request build succeeds.
Continuous Deployment (CD)
At this point in our example there is a NuGet package produced by the build, but we haven’t done yet done anything with it. To be able to push the package to NuGet, a service connection must be set up in the Azure DevOps portal. This is something that you do once. Before you do this, you will need to register for an account at NuGet.org if you don’t have one already. You will also need to create an API key. This one is needed to be able to submit a NuGet package to the gallery using the NuGet command-line utility. The key is created on NuGet.org by signing in to your account and selecting “API Keys” on the upper right. Remember to save the generated key in a secure location because you cannot copy it later. You may regenerate a new the key at any time though, as well as remove an existing key if you no longer want to be able to push packages via the command-line tool.
A service connection is available for use across all tasks in your project. You define and manage them by clicking on the “Project Settings” button in the bottom left corner in the portal and then select “Service Connections” under the “Build and Release” group. If you then click on the “+ New service connection” dropdown, you should be able to choose “NuGet” and fill in your API key, a name that identifies the connection, and the feed URL:

If you don’t care about separating the build of the code from the deployment of the package, you can then simply add another task to the YAML file that pushes the package to NuGet:
- task: NuGetCommand@2
  inputs:
    command: push
    nuGetFeedType: external
    publishFeedCredentials: 'NuGetConnnection'
    packagesToPush: '$(Build.ArtifactStagingDirectory)/**/*.nupkg'
If you want to be able to build and release separately, you can leave the YAML file as is and set up a release pipeline. YAML and CAC is currently a CI only thing. In future versions of Azure Pipelines, you will be able to use YAML to also setup your release pipelines but for now you are supposed to use the designer in the portal to do this.
There are basically two ways to create a release pipeline in the portal. If you have a successful build, you can go to the build summary page and click on the “Create a release” link on the bottom. The other option is to click on the “+ New Pipeline” button under the “+ New” dropdown on the “Release” tab. Both links will take you to the release page where you get to either select a pre-defined template for your release or start with an “Empty Job”. There are built-in templates for deploying various kinds of apps to Azure services, Kubernetes clusters and websites but in this particular example, I’d choose the start-from-scratch option.
A release pipeline starts with one or more artifacts as input. An artifact is a deployable component of some kind that is typically produced by a build, like for example a NuGet package or a bunch of assemblies that make up an application. If you create a release pipeline from a build summary, the artifact that represents the build will be shown in the Artifacts section on the Pipeline tab automatically. If you create the release pipeline from the Releases tab, you can manually select a build artifact by clicking on the “+ Add” or “+ Add an artifact” button.
Besides one or more artifacts, a release pipeline defines on or more stages. A stage basically represents a target or environment to where you want to deploy a release. Each stage is independent of other stages in the pipeline. You might for example want to define a stage that pushes the NuGet package to the integration environment at staging.nuget.org for testing purposes, and another one that pushes the package to the public gallery at NuGet.org. This will require you to set up two separate service connections.
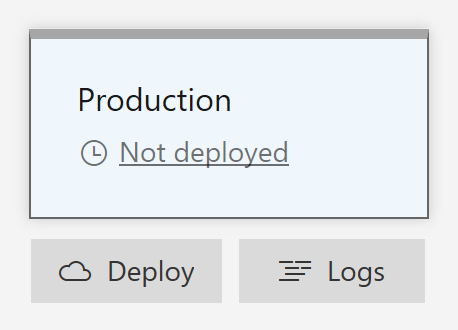
Azure Pipeline’s release management can also be configured to restrict deployments into or out of a certain stage using approvals. Let’s say that you manually want to verify that the integration environment works as expected before deploying to production. You could then add a pre-deployment condition to the production stage by clicking on the icon at the entry point of the stage and select the manual only trigger in the designer:

The other options – after release and after stage – lets you fully automate the deployment of your software all the way to the production environment. If you enable CD by clicking on the lightning bolt icon in the Artifacts section and switch on the trigger, a new release will be created after every new successful build is completed.
The deployment pipeline of a release to a stage is, just like a CI build, made up of tasks. To add a task to a stage, you select the stage in the designer and then select the “Tasks” tab. From there you could then add a NuGet package task:

If you don’t enable the CD trigger, you can manually create a new release based on your release pipeline under the “Releases” tab on the left. Clicking on the “Create a release” button lets you define the trigger settings and artifact source for the deploy. If you click on a stage to change its trigger from automated to manual, you deploy the release later on by opening it in the browser, hover over the stage that you want to deploy to with the mouse and click on the “Deploy” button. This will push the package to the NuGet feed that you have configured in the service connection. When the release has finished, you should see the package being listed on the “Manage Packages” page when you are signed in on NuGet.org.
Status badges
Once you have successfully set up Azure Pipelines to build, test and release your project, you should add a status badge to the description of your GitHub repository. This is generally considered as a best practice in the open source community and adds some quality mark to your project. A CI status badge indicates whether the code in your project compiles, that all tests have passed and that your software works as advertised. The badge itself is an image that you can add to your Readme.md file on GitHub by copying and pasting some markdown from the portal. You will find this markdown in the “Sample Markdown” textbox that shows up when you navigate to the Build page in the portal and select the “Status badge” option in the context menu for the build pipeline.

If you copy and paste the markdown into your Readme.md file and commit the changes, you should see a status badge appear on your project’s description page. The badge will look like below when the latest build succeeded, and it will automatically change appearance to reflect the actual status of the latest build without you having to do anything else manually.

You may also consider adding another status badge for the NuGet package to quickly let consumers of your project know that there is a published up to date package available. The easiest way to add a NuGet status badge on GitHub is to use a service called Shields.io. It serves badges in SVG and raster format on demand and supports a bunch of different providers, styles and parameters. The following markdown will display the current version of the NuGet package with the id “MyPackage”. All you need to do to be able to use it is to simply replace “MyPackage” with the actual id of your package and copy the markdown into your Readme.md file.

Summary
As we have discovered in this post, Azure Pipelines provides a managed service that lets you easily build, test and ship your software in multiple stages, either automatically all way to production or with approvals and on-demand deployments. It’s completely free to use for small teams and open source projects and it scales to support the largest enterprises in the world. Microsoft themselves for example claim to do over 4 million builds using Azure Pipelines every month.
Azure Pipelines targets any developer on any platform and has full support for hybrid clouds, on-premise servers and containers. The idea is that developers can mix and match tools from Microsoft, the open source community and third-party providers to create custom workflows. You can connect to any Git provider and build and deploy your code continuously to any cloud or on-premise environment.
